Tag Archives: Review

Netatmo Welcome Camera for iOS & Android – Review – Updated 4 months later

Welcome to my review of the Netatmo Welcome Indoor Camera.

  
The Netatmo Welcome Indoor camera unique selling point is its ability to recognise faces and then send you notifications to your phone.

See video from Netatmo below showing this in action.

The Key Specifications

– Dimensions – 45x45x155mm
– In the Box – 1 x Welcome camera, 1 x USB cable, 1 x power adapter, 1 x 8GB micro SD card
– Build – Single piece of durable aluminium shell, Matte black plastic piece infrared transparent.
– Hardware Requirements – High-speed Internet connection needed, Public hotspots not supported.
– Connectivity Specifications – Ethernet RJ-45 port: 10/100 Mbits, Wireless: Wi-Fi 802.11 b/g/n (2.4G)
– Camera – Video sensor: 4MP, Resolution: Up to 1920×1080
– Minimum iOS 8 for iPhone / iPad, Android 4.3 minimum
– Browser Support – Webapp available for the two latest versions of: Chrome, Safari, Firefox, Internet Explorer
– Monthly Costs – Nil, Free to Use, App available on the App Store / Google Play.Free access to your camera online.
– Data Storage – MicroSD card up to 32GB (8GB class 10 MicroSD card included)
– Faces – Max 16 faces

The Hardware


The Netatmo Welcome camera is a lovely piece of hardware and doesn’t look like a typical camera. This means it gets blended into your environment without people gets paranoid they are being “watched”. In fact, you forget its actually there. On the rear there is an ethernet port, micro SD card slot and micro USB port. The front is minimalistic.

Background Notes for Review

Notes – I originally reviewed this after 3 weeks. Further down is my update after 4 months following a significant firmware update that added lots of new features which are documented along with a tip if you have dogs.

I have been using the Netatmo Welcome for 3 weeks now and overall have been pleased with its operation and results and intend to keep this indefinitely as my home connected security indoor camera. I also have several IP Cameras which were a total nightmare to setup and configure as remote access involved changing my home router configuration. I have now retired these. In terms of other connected devices, I have a Netatmo Urban Weather station which is coming up to 2 years old and a range of lights that are controlled from my iPhone and or Apple Watch. Due to protecting my own privacy, screen shots of the app in operation have been edited to remove views of my home.

The Initial Setup

Netatmo have made the first setup as simply as possible. I setup my Netatmo Welcome camera using my iPhone 6S Plus. I downloaded the Netatmo Welcome app from the Apple App Store and then followed the on screen setup instructions provided by the app. The app asks permissions to share Wi-Fi setup from your iPhone to the Welcome camera and literally within 5 minutes the camera is connected. Points to note. The Welcome camera only operates at 2.4G . Over the next 24 hours a new firmware arrived and got installed on the camera and the app showed me faces and asked me to identify who the respective people were. For each member of your house, a face profile gets created.

The Operation

The concept of the Netatmo Welcome camera is simple. It learns all the faces of people who live in your home/flat and then notifies you when somebody comes home and tells you who they are and also if somebody arrives who is not recognised. When movement is detected, it records a clip onto the micro SD card which can be streamed back on to your phone and or downloaded remotely to your phone as well. When at home you can also play back the recorded video clips.


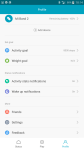
Other options include a range of privacy and advanced security options. For example if your Netatmo password gets changed, or someone logs into your account you can receive an email. Netatmo will also block your account if there are too many failed attempts occur. In terms of learning faces, you can go into the app settings and speed up the learning process. You can also tell the system when the house is empty and adjust other settings as shown below.

  
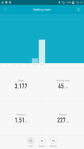
Using the app on your phone is really easy. It shows a live view snapshot when you open the app. You can then hit the play icon to stream live video. Turning your phone landscape provides full screen playback and streaming. Scrolling the screen reveals details of who is at home and or when they were last seen. Scrolling the screen the other way reveals a list of when movement was detected. Tap on one notifications and you can watch or download the recorded movement. Now if your home is broken into and someone steals your camera, you will get a notification that Welcome was switched off. The person cannot access your data and videos without your Netatmo account details. However, this also means if the camera is never recovered, you cannot view the videos stored on the camera either. However, if you sign into My Netatmo on the web you will be able to see a screen shot of each video before it started the recording of the motion.

The video quality is excellent and the camera switches to night mode which provides clear images and video as well.

As I have mentioned I have had the Netatmo Welcome indoor camera for 3 weeks now. In that time, the camera has come offline about 4 times for no apparent reasons and then reconnected a few hours later. I don’t know if its my broadband dropping although that wouldn’t surprise me as the connection does vanish occasionally. I have only had to pull the power cord out and replug back in to restart the camera just once when it became unresponsive. In terms of recognising faces this is now 90% accurate. I have relocated the camera several times to get a better position. To be honest, positioning is crucial. If the camera is recording motion to the micro SD card, it is not possible to see a live view until this has finished.

UPDATE – 4 months later, Netatmo released a major firmware update. This improved its performance and reliability but also added Dropbox support and tags. With Dropbox you can now upload video clips to the cloud instead of using the micro SD card.

wp-1467698483257.jpg

Tags are waterproof sensors for doors and windows. Photo above is one of my tags. The Netatmo tags are superb as they detect the motion before the intrusion occurs. That is because they detect vibrations. The Tags’ have an integrated open/closed state sensor, so you can choose to be alerted if you have accidentally left a window or the garage door open. And then you can check directly on your smartphone if all windows are closed.

Tips – I have 3 labradors and the Welcome camera was recognising my dogs faces. So instead of telling the Welcome camera they were not faces, I did the opposite. So now it recognises my 3 labradors and that means I don’t get any false notifications about an unknown face.

The Special Stuff

The Netatmo Welcome camera supports third apps and that extends to IFTTT. This opens up a whole world of different sequences that can be achieved. See screen shot below.

  
You can also add Welcome tags to the system, sensors for doors and windows. The other aspect I like about the Netatmo Welcome Indoor camera is once bought, there are no other costs. Its free and it has no monthly charges either.

As I mentioned already, Netatmo allow you to sign into to your camera via a web browser which uses their web app. Using a web browser, if you have other Netatmo products, you can access all the different connected devices in one go.

Conclusion

The Netatmo Welcome Indoor camera recommended retail price is £199, although if you click the link below it is available for a lot less. It provides piece of mind with its face recognition and notifications with zero ongoing costs once purchased. Add to the fact it supports third party app integration and it becomes a decent investment. It also doesn’t look like a typical camera so blends into the home environment.

And now after using it for over 4 months the added new features of tags and Dropbox integration really add to its value.

Highly Recommended.

Info and Deals on the Netatmo Welcome Home Camera with Face Recognition

OnePlus 3 – Is it a Flagship Phone for £309 – Review

image

Welcome to my review of the OnePlus 3 Smartphone.

Specifications

– Android 6.0 Marshmallow
– Display 5.5-inch Optic AMOLED ,1920×1080, 401 ppi, Gorilla Glass 4
– Processor Snapdragon 820, Quad-core, 2.2GHz,Adreno 630 GPU
– Storage 64GB UFS 2 – no micro SD card slot
– RAM 6GB LPDDR4
– Rear Camera 16MP IMX298, f/2.0, 1.12-micron pixels,PDAF, OIS,RAW, 4K video, 720p slo-mo
– Front Camera 8MP IMX179, f/2.0, 1.4-micron pixels, Fixed focus, 1080p video
– Connectivity USB 2.0,Wi-Fi 802.11 a/b/g/n/ac, Bluetooth 4.2,NFC, GPS, GLONASS
– Network bands GSM: 850, 900, 1800, 1900 MHz
– Network bands (North America) WCDMA: Bands 1/2/4/5/8,FDD-LTE: Bands 1/2/4/5/7/8/12/17,CDMA EVDO: BC0
– Network bands (EU/Asia) WCDMA: Bands 1/2/5/8,FDD-LTE: Bands 1/3/5/7/8/20,TDD-LTE: Bands 38/40/41
– Network bands (China) WCDMA: Bands 1/2/5/8,FDD-LTE : Bands 1/3/7,TDD-LTE: Bands 38/39/40/41,TD-SCDMA : Bands 34/39, CDMA EVDO: BC0
– CAT 6 (LTE)
– SIM Dual Nano SIM
– Audio – bottom facing speaker, dual mics with noise cancellation, OnePlus Music, Dirac HD,
– Charging USB-C, Dash Charge 5V/4A,Battery 3000 mAh,Non-removable
– Security One-touch fingerprint
– Sensors – Fingerprint sensor, Hall sensor, , Accelerometer, Gyroscope,
Proximity sensor, Ambient light sensor and Electronic Compass
– Hardware keys and on-screen navigation ,Alert Slider
– Custom icon packs, Gesture Control (Display On + Display Off),OnePlus Shelf
– Vibration motor
– RGB LED notification light, Night Mode Display, Dark Theme, System Accent Colours
– Dimensions 152.7 x 74.7 x 7.35 mm
– Weight 158 g
– Colours Silver, Gold

Previous Posts

OnePlus 3 Camera Interface and Menu Options

Camera Samples

AnTuTu and Battery Performance Stats

OnePlus 3 – VR Launch & Shopping Experience

First Impressions

The Main Review – Audio, Connectivity, Camera and much more

Conclusion

Hopefully you liked the video review as a different option to a full written review. Please let me know your thoughts on this approach. Going back to the OnePlus 3, it really has surprised me as to how much phone you get for £309. It is not at the level of a Samsung S7 or S7 Edge or even an iPhone 6S Plus, but then again it only costs £309. However, I personally do like it and would be happy to recommend.

Latest cases and Pricing on Amazon UK – Click HERE.

OnePlus 3 – The Camera Interface & Menu Options

So earlier today you got to see some camera samples from the OnePlus 3. The front and rear cameras take great shots in reasonable to good lighting. The rear camera in lowish light does start to introduce noise but that’s not a surprise considering the 1.12 microns size of the camera lens.

But what is the camera interface like? Lets take a look –

Screenshot_20160620-104536

Top right on the camera screen is the menu icon which when tapped reveals all the different shooting modes.

Screenshot_20160620-104549

Manual mode introduces control of a number of items with shutter speeds up to 30 seconds. You can also change the aspect ratio from 16:9, 4:3 and 1:1 in most modes. You can also turn on a grid and timer control options.

Screenshot_20160620-104608

Above is the shutter speed options.

Screenshot_20160620-104523

In any of the shooting modes, if you press bottom left menu you get the 3 extra settings options shown. Grid, timer, aspect ration. HDR is set to auto by default. This can be turned on all the time or switched off. There is a HD mode too for combining photos to create a higher quality version. Each mode has a range of options as follows –

Time Lapse – Grid Lines, 720p or 1080p
Slow Motion – Grid Lines, 720p only
Photo – HDR, HD, Grid, Timer, Aspect Ratios
Video – 4K, 1080p 30fps, 720p
Manual – Focus, Shutter, White Balance, ISO (100-3,200), Grid, Aspect Ratios, Timer
Panorama – no options
Front Camera – Beautify Controls, Beauty On/Off, Grid Lines, Timer, Aspect Ratios.

It is worth noting that double pressing the power buttons opens the camera, in addition to using gestures (if turned on it settings).

The camera app is easy to understand and use too.

And that is the OnePlus 3 Camera Interface.

OnePlus 3 – Shots from the Camera

image

I took the OnePlus 3 out on Saturday to test the camera. Its been very good in my testing so far. That includes the front selfie camera and rear camera too.

Unfortunately, the weather yesterday was terrible, so I still have more testing to carry out on the camera, but I like what I see.

Below are a number of shots. Do have a look at them. To view full screen, just click on each photo.

And don’t forget to check out my earlier posts on the OnePlus 3 from the weekend, covering the battery stats and performance.

image

Taken indoors in slightly dim lighting. Cropped too. In auto mode in dim lighting when the dogs moved the shots were blurred.

Church of St Michael & All Angels #Princetown #OnePlus3

A fantastic shot from the OnePlus 3.

Church Graveyard #OnePlus3

Zooming in on the grave stone text and its all clear.

Macro #OnePlus3

The macro shot here is good too. Focus on the centre.

Cyclist Photo bombs #OnePlus3

The cyclist was travelling downhill at 30mph as was meant to be in this photo.

Church of St Michael & All Angels #OnePlus3

And finally the church without the cyclist.

I also tested the front camera and the results were great too.

Xiaomi Mi Band 2 – Fitness on a Budget – Review

image

Welcome to my review of the Xiaomi Mi Band 2.

image

I managed to get mine from Everybuying for around £27 plus shipping. I used DHL and it arrived in a few days.

Specifications

– Bluetooth 4.0 v2,
– Languages English,Simplified Chinese
– Waterproof IP67
– Screen type OLED, Touch Screen
– Compatible OS Android,IOS
– Compatibility Android 4.4 / iOS 7.0 and above system
– Battery 70mAh
– Standby time 20 days max
– Charging time 3hours
– Special Features -Call reminder,Measurement of heart rate,Pedometer,Sleep management,SMS Reminding
– Alert type Vibration
– Dial and Band Shape of the dial Elliptical
– 235 mm total length
– 155 – 210 mm adjustable length
– Made of Thermoplastic elastomers, aluminium
– Weight 17g

The Mi Band 2 improves upon the original Mi Band in so many ways. For a start it has a heart rate sensor. It uses a military grade ADI sensor, ADI power efficient accelerometer, ADI heart rate sensor, the screen is resistant to fingerprints and scratches, the button is 0.05mm anodised. The screen is now OLED.

The displays shows Time, number of steps, Heart Rate, distance walked, calories burned, battery info and other data. You can see all these items by lifting your wrist or by using the capacitive button on the Mi Band 2 capsule. You can also customise which data content can be displayed on the Mi Band 2 display.

The Mi Band 2 has new software to calculate the number of steps. Versus my Garmin Fenix 3 HR it counted 200 more steps in a day. The software and design is meant to make the Mi Band 2 55% more power efficient.

Xiaomi state that when you run with Mi Band 2, it measures the pace of your run, monitors you Heart beat and it displays on the screen of Mi Band 2. Mi Fit generates the targeted run, recommends step program, suggests the required weight loss and ultimately increases your health efficiency. This functionality is not available on the Mi Fit app from the Google Play Store. The Mi Fit app (Chinese) version has considerably more functionality with mapping and more. Hence, why if you search on the Google Play Store there are a number of third party apps that fill this gap. These need updating for the Mi Band 2, but several developers are working on updating their apps to work with the new band. However, I have provided details of the Google Play app below.

As the module pops out, different coloured bands will be made available. The module connection is far more securer than the original band.

Mi Fit app.

Screenshot Gallery

The Mi Fit app does display a lot of information and does have auto tracking too which seemed to work ok. Sharing with twitter and facebook and other social networks is possible too. I thought the app notifications was dreadful. The Mi Band 2 displays “APP” and vibrates. Which app is your guess! It allows up to 5 apps to be selected. Samsung Email and Gmail was not showing as an option. In other words, don’t buy this for advanced app notifications.

The Mi Band 2 is new. From my testing the software and firmware need updates to fine tune and improve the tracker. Even so at under £30 it still offers a lot for a lot less than the competition. However, if you don’t want the hassle of software updates to fix, add & improve the new band then I suggest looking at options from FitBit or Garmin which may be a safer and easier option.

Video Review

The video below is an overview and unboxing to give you a better idea of the Mi Band 2.

Conclusion

The Xiaomi Mi Band 2 is a low price fitness tracker. To get the most out of it, you might be looking at using Third Party apps if you are using the Google Play Store app version. App notifications are not its forte. But for under £30 you do get a lot.

As I mentioned at the start, I got my Mi Band 2 from Everybuying for around £27 plus shipping so do check out their store.

Update – Everybuying have offered a discount, if you use this code – EBMIBR2

OnePlus 3 – Battery Performance & Stats

My OnePlus 3 has had one full charge to 100%.

I then decided to hammer the battery to test its performance.

image

So how did it do. The OnePlus 3 managed 5 hours screen on time with 14% battery left to go.

image

That translated into a full days usage. GPS, wifi and Bluetooth were all switched on.

image

So then I plugged the phone in to recharge for 30 mins to test the special Dash fast charger. This took the battery to 75% after 30 mins.

image

Above are the battery stats showing what was happening during the charging.

Now the last test was standby. At 11pm the phone was at 100%. At 6.30am this morning the battery was 96%. So only 4% lost overnight.

Overall a good performance on the battery front from the OnePlus 3.

More tomorrow.

Ooh. Just one last thing. The OnePlus 3 has scored the fastest AnTuTu score I have ever seen!

image

Choetech 33W USB C Car Charger – The Car Charger with the latest tech – Review

image

Welcome to my review of the Choetech 33W USB C Car Charger.

With the rapid expansion of USB Type C and Quick Charge 3, I knew it would not be long before car chargers would be released that were more specific. The Choetech comes with dual ports. One which is a USB C charging port and means it doesn’t matter which way around you place the cable. This as I found is handy at night.

Key Specifications

– 1 x USB C Charging Port: Custom made for Type C charging device like Nexus 6P, Nexus 5X, Lumia 950, Lumia 950XL, Meizu Pro 5, ZUK Z1, LeTV One Max, LeTV One Pro
– 1 x Qualcomm Quick Charge 3.0 Port: Compatible with all versions of Quick Charge technology (1.0, 2.0 & 3.0), up to 4X faster than standard chargers
– Up to 5V/3A for charging Type C supported devices. 5V/2.4A, 9V/2A, 12V/1.5A full charging speed for Quick Charge 3.0 compatible device, 5V/2.4A for most devices
– Safe Guarantee: Over-current, over-charging, short-circuit protection will make the charge safely, without any risk of overheating or damaging your devices.

The Choetech 33W USB C Car charger does exactly what is says on the tin. I also liked the fact that it has a compact like profile. See photo below of it inserted into my car charger.

image

Video Overview

I have also created a quick video overview of the product.

Conclusion and Special Offer

A useful and recommended car charger for anyone thats needs fast charging and ideal as it has a USB C port.

Offer. Choetech have kindly offered a 70% Amazon UK discount code for the first 10 people to email me at gavinfabl at gmail dot com. You then need to ensure you order item via link below too. Be quick!

More information and the latest pricing on Amazon UK – Click HERE.

Motorola Moto 360 Sport & Apple Watch – Review by Ian

Today, Ian reviews his Moto 360 Sport and compares it to his Apple Watch.

From Ian-

It’s been awhile since I’ve looked at Android Wear, I was an early adopter of the LG watch and Samsung Gear Live.

For the last year my Tag Heuer has been put away and My Apple Watch Sport has been my daily driver. But It’s a real love hate relationship. love the build, notifications and changeable straps. Hate the user interface and slow apps, the only one that I find useful is Heartwatch.

Motorola Moto 360 Sport Review photos - review on http://gavinsgadgets.com

So to the Moto 360 Sport, love the round screen and the amount interesting Watch faces. I can also live with the flat tire for the ambient light sensor. Android Wear on IOS is better than expected, provides me with the ability to change watch faces and all my notifications work as they do on my Apple Watch., but on a bigger screen. The downside is no third party apps.

The Moto 360 sport does come pre installed with Moto Body, a running app and also has integrated GPS. I did take it out for a run and compared to Runkeeper on the iPhone. Seemed to take ages to get a satellite lock, compared to my iPhone, the other data and reading from heart rate sensor was comparable to the iPhone with my chest strap. The Moto 360 Sport uses a ‘hybrid’ display, which combines a traditional LCD screen with reflective panel so reading in the sun is an ease, but can seem a little washed out compared to the Apple Watch.

Motorola Moto 360 Sport Review photos - review on http://gavinsgadgets.com

Overall an interesting alternative to the Apple Watch, really like the round screen, but the integrated rubber strap is not nice, picks up dust like you won’t believe. May look at the Huawei watch next or a dedicated Sports watch like the Garmin Fenix 3.

More info and the latest deals on Amazon UK – Click HERE.

Samsung Gear 360 – First Impressions and Video

So having used the LG 360 Cam and being slightly disappointed by the photo and video quality I had no intention of even looking at the Samsung Gear 360.

But then I started to see some footage and read some early reviews and noticed that the video footage looked a lot better than that I took from the LG 360 cam.

Primarily the Samsung Gear 360 has higher quality optics and better software stitching – well that is the claims  I have seen so far.

I will say because the LG 360 cam’s profile is more rectangular / flat in shape it’s far easier to stick in your pocket.

Anyway back to the Samsung Gear 360. First impressions of the hardware and test photos and videos have been pleasing. I will be sharing some of these soon.

I mentioned there was a lanyard strap in the video below. I have since discovered that  this connects to the black tripod. This becomes apparent when you watch the video as you will see the lanyard attachment holes .

For now enjoy my unboxing video and overview.

Apple Powerbeats Wireless Headphones – by Harry

Yesterday Ian provided a review of his current Bluetooth headphone, the TechElec SP-X versus the Powerbeats Wireless. Harry replied to Ian’s post with his experience if the Powerbeats 2 headphones.

By Harry –

I bought some Jaybird bluetooth earbuds at the Apple store a few years ago. I tried them for a few days, but they had an odd effect that I didn’t like. When walking outside, the wind blowing over the wires transmitted into the earbuds and interfered with what I was listening to. Also, anything that touched the wires also interfered with music / podcasts.

So – I took them back to the Apple store. I was really disappointed, because I had wanted some decent A2DP bluetooth earbuds for a long time. But there’s no “demo units” to try out , for obvious reasons.

After arranging for the return with the Apple store sales buy, I went over and looked at the Powerbeats 2.  I think they had just been released. The price knocked my socks off.

I asked the sales guy “If I don’t like these, can I return them?” 
He replied “of course you can”.

So I forked over the 200 maracas and enjoyed those powerbeats for a long time. I wore them out I used them so much. They eventually started to fall apart.  I walked back to the Apple store at lunch one day and bought my second pair.

The powerbeats ship with a large egg shaped zippered semi hard pouch.  If you buy them – always store the earbuds in that pouch. The zipper on the pouch of my first beats broke.  I then took to wrapping two rubber bands around the pouch to hold it shut,  Rubber bands only last a few days,

The second pair I bought are a little more sturdy than the first. Just a little better build quality, They ship with the same egg shaped semi hard pouch.

More info and current deal on Amazon UK – CLICK HERE.