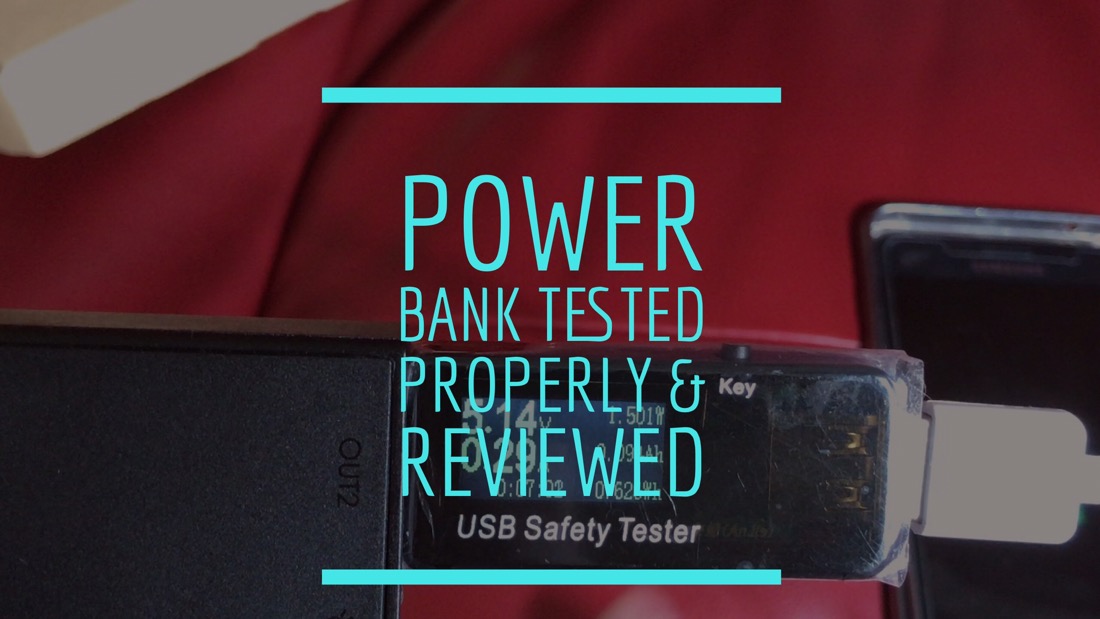
Aukey offer a large range of portable battery chargers. I am going to look at the QC3 16,000 mAh charger.
Key Features
– Charge compatible devices up to 4 times faster with Qualcomm Quick Charge 3.0 technology
– Quick Charge 3.0 Port + AiPower Adaptive Charging USB-A port with dedicated 2.4A output
– Compatible with all USB powered devices including Quick Charge 2.0 & Apple phones & tablets
– Built-in safeguards protect your devices against excessive current, overheating, and overcharging
– In the box – AUKEY PB-T9 16000mAh Power Bank, Micro USB Cable (20cm), User Manual and 24 Month Warranty Card
– Capacity: 16000mAh
– Micro-USB Input: 5V 2A
– Output 1 (AiPower): 5V 2.4A
– Output 2 (Quick Charge 3.0): 3.6V-6.5V 3A, 6.5V-9V 2A, 9V-12V 1.5A
– Dimensions: 6.5” × 2.87” × 0.74”
– Weight: 12.6 oz
– Built in Torch
Video Review
Conclusion
For less than £20, the Aukey power bank is ideal for taken on holidays or a long weekend. It’s a decent power bank with a few neat touches. There’s not much more that can be said 🙂
Cheotech Power Surge Extension review. If you were lucky enough I offered 10 of these for free on my twitter account (@gavinfabiani). Thanks to Choetech for supporting gavinsgadgets! Choetech have an extensive range of accessories too.
So here is my quick review and unboxing.
The Key Features
– Power output of 3250W allows you to connect more high-powered devices.
– 3x standard outlet powering up electrical appliances, computer, TV, stereo for your home / office / business.
– Smart Auto Detect Tech: The 4 x 2.4A smart USB ports can automatically recognize the devices connected and provide the optimum amount of current to each, ensuring the fastest charging possible.
– Sophisticated circuit design with over-heated, over-current, over-charging protection, so you can use this device without any worries about safety.
– Material: Aluminum outer casing & Fire-resistant ABS
– Max AC Output Rating: 250V/13A/3250W
– Surge Protection Rating: 320 Joules
– USB Charging Output: 4 x 5V 2.4A Max 30W/6A
– Power Plug Type: 3 Pin UK Plug
– Cord Length: 1.5M / 4.9Ft
– Dimension: 27*7*3cm; Net Weight: 650g
– CE & RoHS Certificated: Yes
My other post today, I detailed all my Apple lightning adapters ,as shown in the above photo, that I used for my iPhone and iPad. I did not want to go down this route with my new MacBook Pro. So I had a quick look online to see what options were available,
One of my favourite brands is Choetech. They now have a twin pack USB C to USB 3.0 adapters that are compatible with MacBook 12″, ChromeBook Pixel, Nexus 6P and other USB-C devices. As these are also USB 3.0, they supports faster transmission speed up to 5 Gbps. They are also backward compatible with USB2.0 and 1.1 which means all my existing USB devices will connect to these at no extra cost to myself. They also include the built-in 56k ohm resistor follow Type C standard specification. OTG, hot plug and play design is supported with no external driver needed and without software installation. These are very lightweight and designed and constructed with premium grade metal. And a fraction of the price of the Apple own branded adapter.
Another option from Choetech is gorgeous USB C to USB 3.0 cables. Look at the quality in the photo above. The cable is a braided cord, resistant to kinking, bending, and environmental damage. It also features fast sync USB 3 speeds up to 5 Gbps with compatible USB 3.0 device. It is also backward compatible with USB 2.0 and 1.1.
But for me the adapters are just what I needed. Small and perfect and a fraction of what Apple charge for their adapter. This adapter will allow me to charge and sync my iPhone 7 Plus and connect all my “legacy” USB 2 devices.
Useful Links
More information on the Choetech USB C to USB 3.0 Twin Pack Adapters – Click HERE.
More information on the Choetech USB C to USB 3.0 Twin Pack Cable – Click HERE.
More information on the Choetech range – Click HERE.
I have a confession. I have a rather large collection of dongles, all Apple lightning adapters.
I took the photo the other day but didn’t include multiple versions of a dongle. For example I have 4 3.5mm to headphone lightning adapter.
So let’s have a closer look at each adapter and its price. Working from the top to bottom of the photo.
– Lightning to USB 3 Camera adapter – This is the new camera adapter from Apple which now includes the ability to charge at the same time and supports USB 3 – £39
– Lightning to 3.5mm headphone adapter – I have 4 of these for my iPhone 7 Plus – £36
– Lightning to USB Camera adapter – the original one, which costs £29. I have 2 of these. £58.
– Lightning Digital AV adapter – HDMI and a charging slot- £49
– Lightning to VGA adapter – VGA and a charging slot – £49
– Lightning to 30 pin adapter – 0.2m – £39
In addition to the ones shown, I have somewhere amongst all my cables the lightning to 30 pin adapter £29 and lightning to micro SD adapter £19.
So in total, if I was to re-purchase all the adapters again it would cost me £279. I think I am in the wrong business. I need to be selling dongles!
Welcome to my review of the DJI Osmo Mobile. The DJI Osmo Mobile is the new gimbal from DJI for your smartphone.
The Key Features
– ActiveTrack technology built into the DJI GO app allows the Osmo Mobile to automatically keep your smartphone facing you as you move. (not available on the android app currently, only iOS)
– The Osmo Mobile’s 3-axis gimbal system smooths out the movements you make, turning every shot into cinematic video.
– With a few taps, the Osmo Mobile motion timelapse feature shoots video showing the passing of time.
– The Osmo Mobile lets you share special moments in real time using YouTube Live inside the DJI GO app.
– Shoot better photos in low light, with powerful camera stabilisation and full manual camera control.
– The Osmo Mobile’s panorama function automatically captures and blends 9 separate photos together to create one stunning photo.
– Used with its range of accessories, the Osmo Mobile can be mounted almost anywhere, giving you even more opportunities to get that perfect shot.
– Enjoy more than just DJI GO. Osmo Mobile is open for developers to customise.
Above is the optional base to quickly drop the DJI into. The underneath of the base also has a standard tripod screw.
The photo below shows the extension arm secured into the tripod base. The tripod legs extend further in one solid movement.
Video Overview of Hardware, Accessories and DJI Go App
The Lowdown
– The Osmo Mobile supports smartphones measuring from 58.6mm-84.8mm width and up to 8.4mm thick.
– ActiveTrack – The fastest it can track is the same as its Max Controllable Speed, 120°/s.
– ActiveTrack is a feature currently only available on iOS.
– YouTube Livestreaming or Stream Live to Facebook.
– DJI Go App – Lots of extra features (see video) but needs update to fully support iOS 10 and the iPhone 7 Plus telephoto lens.
– iPhone 6S Plus or 7 Plus does not fit with a case on.
– Apart from the normal timelapse mode, there is a motion timelapse option
– The optional base has a tripod screw underneath
– The DJI Go Movie editing app has a wealth of great music but does seem to degrade video quality slightly compared to using iMovie in iOS.
– Connects perfectly every time. With the iPhone 7 and the loss of the headphone jack, it becomes impossible to use an external mic without some trickery or additional hardware.
Sample Video from the DJI Osmo Mobile using the iPhone 7 Plus
My Experience
I have used the DJI Osmo Mobile extensively now and I was surprised that none of the reviews and YouTube videos mentioned that if you are using the iPhone 7 Plus or similar sized phone, it won’t fit or stabilise with any case fitted. I tried with the Apple silicone and leather case. Also, at the time of writing this review (I delayed the review too hoping for an update from DJI), the DJI Go app only supports 1080p video at 30fps and not 60fps as per the default camera app. You can use the DJI with other third party camera apps. The iPhone 7 Plus telephoto lens is not supported in the app either yet from DJI. It looks like DJI need to update the app properly for iOS 10! To connect the DJI to a tripod you will need the extension arm. This has a standard tripod mount screw underneath. If I had know this prior to purchase I would not have bought the DJI tripod base, as this used with the extension arm is not still enough in the winds of Dartmoor.
In the photo above you can see the extension arm is attached to my normal tripod and securely. I am keeping the DJI tripod base as this works well indoors as a lightweight alternative. The plastic base from DJI is ideal for placing the DJI Osmo Mobile into for quick use, say on a table for editing VLOGs.
The motion time lapse mode is fantastic. Panoramic shots are spooky good. The gimbal just moves all buy itself to take the panoramic photos. However, the file size outputted is only around 3mb vs the native iPhone app which can be over 3 times this size.
One problem using the DJI with the iPhone 7 is the OIS on the iPhone sometimes conflicts with the DJI. There is not much you can do about this, accept during post processing when this can be fixed. All the footage shown has not been adjusted to enable you to see what you get first hand.
Despite some of the negatives, which will likely be solved when DJI updated their app, I have found the DJI Osmo Mobile a joy to use. The included software adds lots of extra functionality and the active tracking is superb.
Conclusion
Despite some bugs in the DJI Go app, it is one of the easiest gimbals to use and setup. It also works really well and the extra options provided by the software make it a joy to use. Highly recommended.
More detailed information and pricing on the DJI Osmo Mobile – Click HERE.
Welcome to my review of the Groov-e Portable Karaoke Boombox Machine with CD Player and Bluetooth Wireless Playback. The recommended retail price is £69.99.
Video Review
The Key Specifications
– Bluetooth Wireless Playback
– CD Player: CD, CD-R/RW Compatible
– Karaoke: CD+G Compatible
– Flashing LED Party Light Effects
– LED Display
– Automatic Voice Control
– Echo Control
– Master and Microphone Volume Controls
– Program/Repeat Function
– Skip/Search Function
– 2 x Microphone Inputs
– RCA Audio Output
– Composite Video Output
– Carry Handle
– Speaker Power: 2 x 1W
– AC Power: Mains Cable
– DC Power: Batteries: 6 x C Size (not included)
What’s in the Box
– 1 x Groov-e GCPS923 Karaoke Boombox
– 2 x Microphones
– 1 x CD+G Karaoke Disc with 10 Songs
– AC Mains
– RCA Audio Cable
– RCA Video Cable
The Lowdown
Groov-e have brought out a brand new Karaoke Boombox. It features 2 microphones and a pre-loaded disc, the days of Stars in their Eyes can be revived through a smartphone screen.
The Groov-e Karaoke Boombox is compatible with CD+G Karaoke discs. However, all your current CD’s can be used too. If you are a person without any CDs you can use the Bluetooth wireless playback from any compatible device, such as a mobile phone or tablet. This mean you can sing along to the song with the lyrics displayed on your device. For those who prefer the bright lights of the big screen, the lyrics can be displayed on your TV using the video-output function.
With a second mic, duets become a reality. In a dark room the integrated flashing LED party lights adds a bit of fun.
Conclusion
The Groov-e Karaoke Boombox is fun product and would make an ideal present. I can see this appearing in many Christmas stockings!
Useful Links
For more information and the latest pricing on Amazon UK – Click HERE.
The DJI Osmo Mobile is the new king on the block for stabilising your iPhone and android. Sorry no windows smartphone support.
It comes with a swish app on android and iOS too which adds a whole wealth of features. Now, I have watched many YouTube reviews of this new stabiliser and most left out the weaknesses. I intend to cover off everything, good and bad.
For now below are 2 short clips, both stabilised. One edited using the DJI Go app and the other using iMovie.
First up the clip using the DJI Go app.
And next a clip created using iMovie on the iPhone 7 Plus.
Now, these are the first video clips from the DJI Osmo Mobile and I am certain based on my learning curve, I should be able to improve the footage and the types of shots possible from moving timelapses and more.
Useful Link
More info and latest deal on Amazon UK – Click HERE.
Welcome to my review of the Polk BOOM Swimmer Duo. The Polk BOOM Swimmer Duo is a great bluetooth speaker. I am having a blast using it and it has replaced all bluetooth speakers in my home. Now watch my review to find out more, and watch it dance too! The recommended retail price of the Polk BOOM Swimmer Duo is £49.99.
Video Review
The Polk BOOM Swimmer Duo Lowdown
Waterproof – The Polk BOOM is IPX7. That means it can be immersed in up to 3 feet of water for 30 minutes. Take it to the pool, ocean, and even the shower. Bottom line — just soak it and boogie away.
Dirtproof – Completely sealed from dirt, dust, mud and sand, the Swimmer keeps all filth out and your favorite tunes on full blast wherever you adventure. Journey on!
Shockproof – The Swimmer’s rugged rubberized exterior is built to absorb the drops inherent in any great adventure. Leave your worries at the door and don’t worry about dropping it.
Key Specifications
– Power Ouput: 2.5 Watts
– Battery Type: Lithium-ion Polymer 3.7 V, 430 mAh
– Battery Charge Time : 2 hrs at 0.5A
– Frequency Response: 220Hz – 20kHz
– Signal-to-Noise Ratio: > 75 dB
– Transducer: 30 mm full-range suspended within 45 mm passive-radiator
– Bluetooth Version: v4.1
– Bluetooth Support: A2DP v1.3, HFP v1.6, HSP v1.2, AVRCP v1.5, SPP v1.2
– Bluetooth Transmitter power: 8 dBm
– Bluetooth Transmitter Frequency Range:2.402 – 2.480 GHz
– Battery Life – 8 Hours
– Link 2 for stereo
– Answer calls, end calls, adjust volume and tracks
Final Thoughts
When I first got my Polk BOOM Swimmer Duo my expectations were blown away from the moment I turned it on. The sound is loud and punches way above its weight. Its versatility from being waterproof, dirtproof, shockproof and attachable to clothing, walls, chairs and more make it a clear win and recommendation.
My Beats Solo 3 Wireless headphones arrived yesterday. I was very excited to open the box and test these for a number of reasons. Firstly, the packaging and presentation is first class. When you open the box, the headphones themselves are folded inside a protective case. Lift the case out and you get the cables and extras that come with the headphones.
The second reason was to see what difference the Apple W1 chip made to the bluetooth process, setup, sound and real world usage.
I had watched the videos from Apple showing how the AirPods that also have the W1 chip, just connect by opening the protective case. I honestly did not believe it would work “magically” as shown, but the Beats Solo 3 Wireless headphones did just connect to my iPhone 7 “magically”. I simply pressed the power on button on the headphones, a big notification instantly appeared from the bottom of my iPhone asking if I wanted to connect. I tapped “connect”. And that was it. The first connection was over in a second. Not only that it named the Beats “Gavin’s Beats Solo 3” as you can see.
Not only does it pair instantly, every time I have turned it on and off and on again, it connects like a bullet. But it doesn’t stop there. Now that I have paired it to my iPhone, it is now paired to my Apple Watch, iPad and MAC using iCloud. So neat.
So what do these £249 on ear headphones sound like? Well, not £249 headphones IMO. More like £150 headphones but I am still burning these in. Over the last hour, they have improved a lot. At the moment they do not sound as good as my Sennheiser Momentum Wireless 2.0 or B & O Beoplay H5 headphones. They have improved since the last hour and I am listening to them as I type this and I am noticing better mids and treble occurring. Once I have burnt these in for 50 hours, I will let you know my final thoughts on the audio quality. However, it is worth remembering part of the pricing is paying for the Beats branding and the Apple W1 processor and included technology.
The headphones have controls on the left earcup to activate Siri, take and receive calls, control your music and volume. They feature dual beaming microphones for clearer calls. Siri worked perfectly, but I need to test voice calls to see how they perform. One feature of these headphones is the 40 hour battery life from one charge, and the quick charge option that gives 3 hours playback after a 15 min charge from a low battery.
So have Apple invented bluetooth. No. But they have made the experience amazing. This is by far the quickest and easiest pair of bluetooth headphones I have ever paired, used and connected. Also, the signal has not dropped, not even once, not even for a blink of an eye.
My final thought is this – “Why are you wasting your energy, plugging headphones into a 3.5mm headphone jack or lightning port?”. Wireless is the future and the future is now!
I had the original Gear VR which I used with my Samsung S7 Edge. So last week, I got my first attempt at setting up and using the new Gear VR which is designed to work with the new Samsung Note 7 and also be backward compatible with older phones. (If you haven’t exchanged your Note 7 yet, don’t use the Gear VR as its dangerous).
First up the new Gear VR is lighter on the head. It only needs one strap, the second strap is optional. The new Gear VR feels slightly smaller too. The field of view has been widened too and the clarity is that little bit better too. This all adds up to an improved view of VR and 360 media. Footage is slightly clearer and the overall experience is improved.
The software is vastly improved and it is looking really polished and one of the best low cost VR experiences I have witnessed. Unlike the previous Gear VR, you connect your Note 7 case less to the device and then put the dust cover to one side. This does not cover up or connect whilst the phone is in position.
When you first clip your phone into the Gear VR, you see a message inside that says to remove the Gear VR and install all the software required and setup your Oculus account. Once you have done this, put the headset back on. Make sure you install Samsung Internet and Samsung Gallery. Samsung Internet gives you access to YouTube and YouTube 360 degree videos. Samsung Gallery is the app you need to access your own 360 content. When accessing YouTube via Samsung Internet, when a 360 video starts playing, tilt you head to reveal the Samsung Assistant, select this and then you can select the view in 360. It really is simple to do.
I have watched many films and YouTube videos of Mount Everest and other similar mountains, but to witness the peak being climbed in 360 degrees is truly fantastic. There are plenty of other games and apps to explore as well. Don’t play Temple Run unless you are using a bluetooth game controller, otherwise you will feel sick very quickly.
If you want to be transported into a virtual world, the Samsung Gear VR is a great way to start enjoying the experience.
So my next test was to ask my wife to try it. She uses an iPhone is hardly ever upgrades her phone so it not that interested in the latest phone technology. First, I got her to experience the Mount Everest 360 VR video, then some 360 photos and then she asked me what the Netflix app did. So I got her to launch it, and then she started watching one of her TV programmes. After that, I wanted my Note 7 back, and went off to test a few gadgets.
About an hour later, my wife says, I want a pink Samsung Galaxy S7 with a Gear VR. Not only had she researched the pricing, colours and all the options, she even worked out how much her iPhone would sell for second hand. So why did she want to swap her iPhone to the S7? Just to use the Gear VR because she realised it only worked with a Samsung S7!
That’s how much of a positive impact the Gear VR is, and the new version is more comfortable, slightly ligher and provides a marginally increase in quality and a field of view.
Just a shame the Note 7 is too hot to handle at the moment.