Welcome to my review of the miGuard Response A105 Wireless Plug and Play Alarm system. I was looking at the various options on the market and decided to take a closer look at the miGuard A105 starter kit as it seemed to tick all my requirements and was priced reasonably at £69.99. It also had the ability to be expanded which was a key feature for my circumstances.
The Key Features –
– 100% Wireless configuration
– One Button Pairing
– Works as an accessory or standalone alarm panel
– Built in battery for 8 hour standby
– Mute operation and remote alarming
– Supports up to 40 wireless accessories include remote control
– Built in 1,000,000 RF codes combinations to maintain high reliability
Key Specifications
WS-105 Alarm Panel
– AC Power Supply 3.7 V 600mAh lithium backup battery
– Volume 90db
– Static Current less than 13mA, Alarm current less than 100mA
– Radio Frequency – 315 MHZ or 433.92 MHz
– Dimensions 90 x 90 x 42.5mm (plug part on rear not included in dimensions)
PIR-910 Pet-Immune PIR Motion Detector
– Power supply DC 3V (2 x AA batteries)
– Static current less than 90ua, Alarm current less than 9.5ua
– Detection scope 8m/110 degrees
– Transmitting distance less than 80m
– Radio Frequency – same as WS-105
– Detector dimensions 108 x 52 x 36.8mm
– Bracket dimensions 52 x30 x 26.5mm
RC-80 Remote Control
– Power supply DC 3V (CR2025 lithium battery)
– Transmitting current less than 7mA
– Transmitting distance less than 80m in an open area
– Radio Frequency – as WS-105
– Dimensions – 58 x31 x 9.5mm
DWC-102 Wireless Door/Window Contact
– Power supply DC 1.5V (1 x AA battery)
– Static current less than 35uA, Alarm current less than 40ua
– Transmitting distance less than 80m
– Radio Frequency – same as WS-105
– Transmitter dimensions 71 x 34 x 17.5mm
– Magnet dimensions 51 x 12 x 13.5mm
In the Box
– 1 x WS 105 Alarm Panel
– 1 x PIR-910 Pet-Immune PIR Motion Detector
– 1 x DWC-102 Wireless Door/Window Contact
– 2 x RC-80 Wireless Remote Control
– 1 x Bracket for PIR Motion Detector
– 2 x Double sided tape for door/window contact
– 1 x User Manual
– 2 x screws and wall plugs
In other words, everything you need to get you going is included in the box. So how does it all work and function? Answer very easily but let me explain.
The WS 105 Alarm Panel receives and processes signals from all the other components. Apart from those included in the box, you can add up to 40 wireless accessories. I really like this aspect of the system. The Alarm Panel is the device on the right side of the photo with blue plastic in the middle. If the alarm panel is triggered it sounds a loud alarm noise and the strobe light flashes. It is powered by AC 100 – 200V simply by plugging it in to the wall socket. To operate you just press the button on located on the front. Press to arm or disarm accordingly.
The PIR-910 Pet Immune motion detector works off 2 AA batteries. It features an intelligent passive infrared motion detector, designed to detect humans within 0 to 8m. It also features a fuzzy logic to minimise false alarms. I have dogs so wanted to see how this worked with them. The specs state that pet immunity is for small animals up to 25 kgs. It worked with the 2 girls but George is much bigger and he triggered the alarm. To aid fitting the detector a wall bracket is provided which includes a ball head to help position correctly.
The DWC-102 Wireless Door/Window contacts are fairly self explanatory. The two pieces work using magnets and when the magnet is moved away it transmits to the alarm panel. Double sided tape is provided too for fitment. This detector used 1 x AA battery.
Finally the whole package is rounded off with 2 remote controls. These allow you to arm, disarm, activate SOS and Home Mode. Home Mode is available when you are using zones and means all the detectors are active except for the Home zone area. The SOS button is pressed twice switches to home mode and turns the nightlight on as well.
The included user manual is excellent and provides lots of detailed diagrams and instructions and how to correctly install and position all the detectors plus explains all the extra options. For a beginner, it is simply and plug and play system, but with the ability to expand the system onwards and upwards it can become quite a mighty piece of kit.
Conclusion
The miGuard A105 DIY Alarm system has proven to be reliable and simple to use piece of kit and therefore is recommended by me.
I have fond memories of my Nokia Lumia 1020. It had a camera that was in a class of its own. And it has held on to this crown despite being obsolete in smartphone terms.
By today’s standards the Nokia Lumia 1020 is a compromise. It’s runs Windows Phone which despite being one of my favourite operating system lacks the same level of apps in terms of content and quality versus android and iOS, and is extremely slow from shot to shot.
So what phone has de-throned the Nokia Lumia 1020.
Well it’s the LG V10.
I can hear loyal Nokia fans screaming in disbelief. Well facts are facts. Steve Litchfield and I went out armed with our respective phones, Steve with his Lumia 1020 and 950 and myself with my iPhone 6S Plus and LG V10.
Steve went to his favourite church to demonstrate the quality of the 1020 low light shots. The subject matter was a sign/plaque high up on the church wall. So Steve went first and took a great shot of the sign in low light and showed me the level of detail. It was impressive. So I took a shot on the iPhone 6S Plus which was ok and good enough but not as the same level of the 1020. So next I used the LG V10. Well the LG V10 produced a shot significantly better than the 1020. And this was all auto. Surely a one off, so another shot was taken. Same stunning shot and way better than the 1020.
And the story continued with a few other low light shots. However, I do expect the new flagships from LG and Samsung to improve further in the camera department.
One small point, both of Steve’s Lumias (1020,950) both crashed in a space of 30 minutes several times.
PS Steve had a Mozo leather back on his Lumia 950 which looked much better than the default plastic back. But sadly the standard 950 even with a leather back felt cheap and nasty. Shame.
Below is shot from LG V10. It was actually fairly dark inside the church so the V10 did a stellar job. The plaque writing when zoomed in is really visible.
Update – Steve has emailed me his 1020 shot which was taken using xenon flash. Note that’PureView zoom’ was done at capture time, for best quality. Not ‘afterwards’. In my opinion it is still a good shot as I said above but not as good as the LG V10. But do you agree?
I had heard a lot about the Fake TV so decided to try one myself. It is manufactured by Response Electronics. With the Fake TV it appears as if you are at home watching TV and therefore fools burglars to think somebody is at home.
Key Features
– Visual deterrent to intruders/burglars: giving the appearance that someone is at home watching TV
– Realistic TV programme simulation: completely unpredictable, no light or colour pattern repeats
– Eco friendly – uses less power than a night light
– The built in computer controls its super bright multi-colour LED light output – equivalent to a typical 27″ TV
– Light sensor automatically triggers FakeTV at dusk
– Two settings: Dusk+4 hours and Dusk+7 hours
– Automatically turns on when dark outside (0.5 lux)
– Automatic shut-off at the switch selectable time
– Mains powered – 240V AC Adapter included
This £25 gadget is so simple and brilliant to use, I just wished I had invented it myself. All you have to do was plug it in a room, in a way that it can’t be seen from the outside. You could for example close your curtains so there is just a peep of activity visible from outside. If plugging it in upstairs, it probably is not as important to shield it from people outside as they are unlikely to be that tall to see thru an upper floor window from the outside. Once in position, just turn it on.
For my tests, I plugged it into a front bedroom located upstairs. It came on automatically at dusk. I then stepped outside to view the scene appearing from the upstairs window. It absolutely looked like someone was watching TV. I watched the view from outside for a good 30 mins. A few hours later, I went outside again and was just as amazed as I was originally. In fact, it looked like adverts were running at one point too. Size wise the Fake TV is the size of your hand. It projects a strong mix of light across your room with ease. It also only uses the same amount of energy as a night light.
The Fake TV is a simple idea but a good security device to act as a deterrent against burglars. Sometimes the simplest ideas are the best, and this is one of them.
Welcome to my review of the Asus Zenfone Zoom. Before I published my review I posted a number of miscellaneous articles that you may wish to view which are connected to the main review. As usual if you have any questions, please ask. With all the photos, clicking on the image will reveal the original.
This review will also be added into the main phone reviews section. Just use the menu, index, reviews. In this review section you can find reviews for over 100 devices.
This phone is special. It has a 3 x optical zoom lens which operates without any moving external parts. The whole mechanism is internal. It also has laser auto focus as well as phase detection. As a smartphone it comes with all the bells and whistles too. See video below for more information on the camera.
So what’s inside the box? The photos below show the contents of the box. I like the fact it comes with a lanyard that attaches securely to the phone. You also get a pair of headphones, quick start guide, UK adapter and micro USB cable.
The key specifications are –
The other specifications based on model ZX551ML –
– Display – 5.5-inch 1080p Full HD, 403ppi, IPS LCD
– Corning Gorilla Glass 4
– Processor – 64-bit 2.5GHz Quad-core Intel Atom Z3590 CPU
– Graphics – PowerVR G6430 GPU
– RAM – 4GB LPDDR3
– Internal Storage – 64GB eMCC Flash or 128GB eMCP Flash
– External Storage – microSD (up to 128GB)
– Cameras – Rear – 13MP Panasonic SmartFSI sensor with a 10-element Hoya 3x optical zoom lens, aperture ranges from f/2.7 to f/4.8
– 5MP front-facing camera
– Software – Android 5.1 with ASUS ZenUI
– Connectivity Wi-Fi 802.11a/b/g/b/ac
– Bluetooth 4.0+ EDR
– Android – 5.0 at launch
– Network Bands – UMTS/WCDMA/FDD-LTE, Data Rate: HSPA+: UL 5.76 / DL 42 Mbps, DC-HSPA+: UL 5.76 / DL 42 Mbps, LTE Cat4:UL 50 / DL 150 Mbps, 2G :GSM : 850MHz/900MHz/1800MHz/1900MHz , 3G :WCDMA :850MHz(5)/850MHz(6)/900MHz(8)/1900MHz(2) /2100MHz(1), 4G :FDD-LTE: (TW/JP version)
2100MHz(1)/1900MHz(2)/1800MHz(3)/850MHz(5)/2600MHz(7)/900MHz(8)/1800MHz(9)/800MHz(18)/850MHz(19)/700MHz(28)
– Navigation – GPS, GLONASS, AGPS & BDS
– Sensors – Accelerator/E-Compass/Gyroscope/Proximity/Ambient Light Sensor/Hall Sensor
– NFC
– micro-USB
– Battery – 3000mAh non-removable Li-Polymer – comes with a rapid charger
– Dimensions – 158.9 x 78.84 x 11.95mm
– Weight – 185g
– Build – aluminium body with a removable leather back cover for accessing the micro SD and Micro SIM slots
The Main Settings and Other Phone Options
Further down I have created a gallery of screen shots of a number of different settings options. Tap on one photo to open the gallery.
The first aspect of the phone I like is the double tap to turn on or off. Other useful aspects are the inclusion of NFC, One Handed Mode (double tap home key to turn on), Power Saving options, Easy Mode and also a kids mode. Are you brave enough to allow your kid to use the phone! Wi-Fi also includes support for Wi-Fi Direct. Bluetooth includes APT-X. Data usage is split between Mobile Data and WiFi as well as details of data usage per app. The display has options for adjusting the colour balance and also activating a blue filter for night time viewing. I have never used a blue filter at night until I got this phone, but it really helped reduce my eyestrain. ZenMotion is a range of motion gestures used as shortcuts for various actions. Double tapping the home key when one handed operation is active, reduces the size of the screen. You can move the screen around too. You can also write on the screen to launch different apps. What is neat is there are options to launch the front camera by scribbling a “S” and a “C” for the rear camera. A decent do not disturb option is available. The lock screen has the option for quick access apps and whether or not to allow the physical keys to turn the camera on. See the screen shots to show all the details. Theming is everywhere with loads of customisations galore for every aspect including resizing the icons on the fly. I see no need to install a third party launcher with the Asus Zenfone Zoom.
Phone, Cellular and Audio
As a phone, the Zenfone Zoom performs really well. Calls were clear and people had no problem hearing me. The phone also has a recording button, again another useful option. Viewing angles were reasonable. Cellular strength and wifi seemed good too. The Zenfone Zoom is single micro sim and then a card slot for micro SD cards up to 128gb. On the LTE front, band 20 is missing. However, I never had an issues with data speeds using the Zenfone Zoom. AnTuTu scored 59,160 which is fairly close to the LG V10.
Audio. The rear loudspeaker is ok, maxing out around 88db. It is on the back, but doesn’t get totally muffled as their is a ridge on the back. Bluetooth APT-X is present and when you connect using a pair of headphones with APT-X, the APT-X logo suddenly appears on the screen and floats away. USB Audio is also supported and works well. The Zenfone Zoom has its own AudioEQ app to help improve the sound quality. It is a little gimmicky but it does work and make a difference. Overall sound quality is average though, slightly better using bluetooth APT-X and good via USB Audio.
The Camera App Interface
Ok, so this is a camera centric phone. So what are the options.
Front Selfie Settings
The front camera has lots of options from a timer that can be made to go off from 1 – 5 secs. To control the length, you just slide the shutter icon into the screen centre. The more you slide, the longer the delay becomes. Beautification is all the rage and the options include cheeks thinning, eyes enhancement, skin softening, blush effect, face/smile tracking. I had a lot of fun with the front selfie camera and was pleased with the shots even in lower light. I lost at least 10 years off my age with the beautification options 🙂
Rear Camera Settings
The rear camera has a feast of options. Or you can just use the auto mode. The operation of the camera is aided by a 2 stage physical shutter button and a physical button for launching video recording. The video button is next to the 2 stage shutter button. The volume keys then act as zoom controls. By default the settings are left to use the 3x optical zoom only and in my tests it bests to avoid using the digital zoom that goes all the way to 12 x zoom. It is better to crop into the 3 x optical zoom shots as the quality will be superior.
When in Auto mode, if a better mode will produce a superior result, the mode icon appears bottom right. Tap on the icon to switch to this mode, or turn off. Typically this appears for HDR or Low Light mode. To give you an idea of the setting ranges in manual mode.
– White Balance – 2500K to 6500K
– EV – -2 to + 2 in intervals 0.3, 0.6 1.0 etc
– ISO 50 to 3200
– Shutter speed – 1/16000 (thats right, its super fast) to 32 seconds for long exposures
– Manual Focus – slider control
– Horizontal Level
– Histogram – on or off when taking photo
In Auto Mode you get the following options which alter if you are using another mode.
– White Balance – Auto, Cloudy, Daylight, Fluorescent, Incandescent
– ISO 50 – 3200
– Photo Optimisations – Auto, Off, Manual – Manual gives fine tuning for saturation, contrast, sharpness, noise reduction, backlight, detail enhancement
– Camera Resolution – 13MP 4:3, 10M 16:9, 8MP 4:3, 6MP 16:9, 5MP 4:3, 4MP 16:9
– Anti Shake enhancement – Auto or Off
– Digital Zoom – on or off
– Image Quality – Fine, Standard
– Timestamp – On or off
– Shooting Mode – Touch Shutter, Self Timer, Burst (off, normal, turbo)
– Focus & Exposure – Smart AF, Infinity
– Metering Mode – Centre, Average
– Touch Auto Exposure – on or off
– Face Detection – On or Off
For Video you get the same options with regards to white balance controls and EV adjustments as stills!
– Video Quality – Full HD, HD and TV (640 x480)
– Video Stabilisation – on or off
– Video Preference – Performance or Quality
– Video Touch Auto Exposure – on or off
Generic settings include smart brightness, guidelines, info screen, review duration, shutter animation, shutter sound on or off, launch by physical buttons options, location, correct photo orientation on or off, anti flickr 50 or 60Hz, Power Saving Mode, Set Volume keys for shutter or zoom, save to internal or SD card and a tutorial.
So what do the different photo modes do?
– Auto – automatically determines the cameras best settings based on the environment
– Manual – You decide
– HDR – Expands the dynamic range
– Beautification -makes you look beautiful
– Super Resolution – Combines multiples shots to create incredible detailed photos
– Low Light – boosts up light sensitivity for a clear and bright low light shot without using the flash. Images are 3mp 16:9.
– Night – Allows a slower shutter speed to capture more light in dark scenes
– Depth of Field – Captures photos of close-up subjects with a soft background
– Effect – applies a range of filters
– Selfie – use the rear camera for a high res shot
– GIF Animation – converts a series of images into a moving image or GIF
– Panorama – Horizontal or Vertical
– Miniature – Creates a photo of life size object and turns it into a small scale model
– Time Rewind – Records images before and after the shutter and allows you to select the best ones
– Smart Remove – removes unwanted moving objects from the background
– All Smiles – Combines each persons best expression from multiple shots into a single perfect group photo
– Slow Motion – records fast moving objects with very high frame rate and plays back in slow speed
– Time Lapse – Time lapse recording.
Each of the above modes often have a few extra options too.
Photo Editing Options
After taking a photo, you can easily check the information of the photo, from the time and date, weather at the time, width, height, file size, device, flash, focal length, white balance, exposure time, storage location, and geo location displayed on a map with the coordinates.
Post processing allows for all the beautification options as mentioned previously, applying over 17 filters, adding frames, cropping, straightening, rotating, mirroring or drawing, or fine tuning the photo (auto, exposure, vignette, grads, contrast, shadows, highlights, vibrancy, sharpness, curves, hue, saturation, BW filter, negative, edges, posterise, blur, feather or relief).
Turbo Burst Mode – This uses a ratio of 16:9 and reduces quality to 3mp.
Normal Burst Mode – Full size photos
Auto Mode Shots. You can see below examples of non zoomed versus 3 x optical zoom. Having the optical zoom really makes such a big difference. I was also surprised how much more appealing the Zenfone shots were over the iPhone 6S Plus.
Shots edited in Snapseed using the HDR Scape filter.
Super Resolution Mode shots.
Video Samples
Camera Quality Opinion
This is the question you have all been asking me. Just how good is the camera and how does it rank amongst the best out there. Lets cut to the chase. It is no LG V10 or Samsung Galaxy S6 Edge Plus killer. The phones on these cameras are better. But none of these phones have 3 x optical zoom and that is the Zenfone’s killer aspect. The Zenfone Zoom does not have 4K, outputs lower resolution panoramic photos than the competition and is not naturally good in low light due to its small pixel size and f/2.7 aperture. Using some of the manual, night or low light modes you can compensate and achieve some reasonable photos, but again they are not a patch on the V10, S6 Edge+. Even the iPhone 6S Plus takes better shots in low light, although the difference is not huge. The front selfie camera is fine. So if you are out and about visiting a tourist attraction, I would have the Zoom with me as the ability to zoom in that extra bit is very useful, especially over something like the iPhone 6S Plus. The Zenfone Zoom surprised me with its burst mode. It is not super fast but it did focus and capture a sharper shot than my iPhone 6S Plus. The Zoom also over saturates shot. This can be changed permanently by using your own shooting profile. Optical image stabilisation worked well in my testing. So how does this compare to the Nokia Lumia 1020, Samsung Galaxy S4 Zoom and Samsung Galaxy K Zoom. Well all of those 3 phones are obsolete now! But from an image quality point of view only and ignoring the smartphone aspects, the 1020 is better, so is the S4 and K Zoom. But remember the Zenfone Zoom has no optical zoom mechanism protruding from the front. My final viewpoint on the Zenfone Zoom is personally I really loved using the camera. I got some smashing shots from it and loved using all the different camera shooting modes. Its somewhat adorable and I don’t know why 🙂
Conclusion
The Asus Zenfone Zoom costs around £350. It comes with some clever engineering in the camera department and as a smartphone is extremely versatile. The camera quality is average and then assisted by the 3 x optical zoom making this phone unique. The 2 stage shutter button is excellent too along with the camera app allowing for some creative photos. As a smartphone it includes everything practically. As an overall package it is recommended.
Suffering from man flu, I have only managed a few shots from the LG V10 today. In addition the weather on Dartmoor was horrendous, as you will see below.
Something interesting occurred today as well. I was copying music across to the V10, and it displayed its device name as the LG G Flex 2 on my computer.
PS. Tomorrow the Asus Zenfone Zoom full review goes live!
Yesterday I took around 200 photos with the LG V10. I then compared the shots with those I had taken from the LG G4, and somehow the V10 even on stills takes better photos. Video is equally improved from the G4.
Below are some dog shots and photos of Dartmoor. The level of detail is excellent, from being able to zoom in on the grass on Fury’s tongue (black labrador) and more.
I did record some video, although I can’t share this for privacy reasons, but it is equally as impressive.
Don’t forget to click on the photo to view the original.
Finally the LG V10 has arrived. My thanks go to Clove Technology for helping me out after UPS mysteriously lost the first V10.
Clove Technology are selling the LG V10 currently for £375 plus VAT. If you’re quick you also get a pair of Bluetooth gloves worth £10. Now that is cool. In fact if you spend £25 or more you get the Bluetooth gloves while stocks last!
The European LG V10 is different to the other versions. This model has all the UK bands but drops the internal storage from 64gb to 32gb. Apart from that it’s one super geeky cool piece of tech.
Now I really enjoyed the G4, but the V10 takes it to another level. Whatever the G4 lacked, the V10 has in style. First impressions of the hardware are of a solid semi rugged phone. The secondary display, two front selfie cameras for different angles, gorilla glass 4, fingerprint sensor, metal frame, grippy back, infra red blaster, Sabre HiFi DAC and legendary camera with manual controls for photos and videos.
Last night it was impressive to connect my Sennheiser headphones and only need the volume at 30 out of 100 due to the Sabre HiFi DAC and Amp.
And oh the camera. It’s so much better than the iPhone 6S Plus.
Finally, three top class smartphones and time to compare some photos.
The weather in the UK is no so good so this is a quick initial comparison.
First up lets have a look at what the Apple iPhone 6S Plus can achieve.
The colours are well balanced on the iPhone. You can crop a reasonable amount too. I must admit I don’t like the 4:3 aspect ratio anymore especially as when viewing on the iPhone screen it looks odd with black spaces either side of the photo.
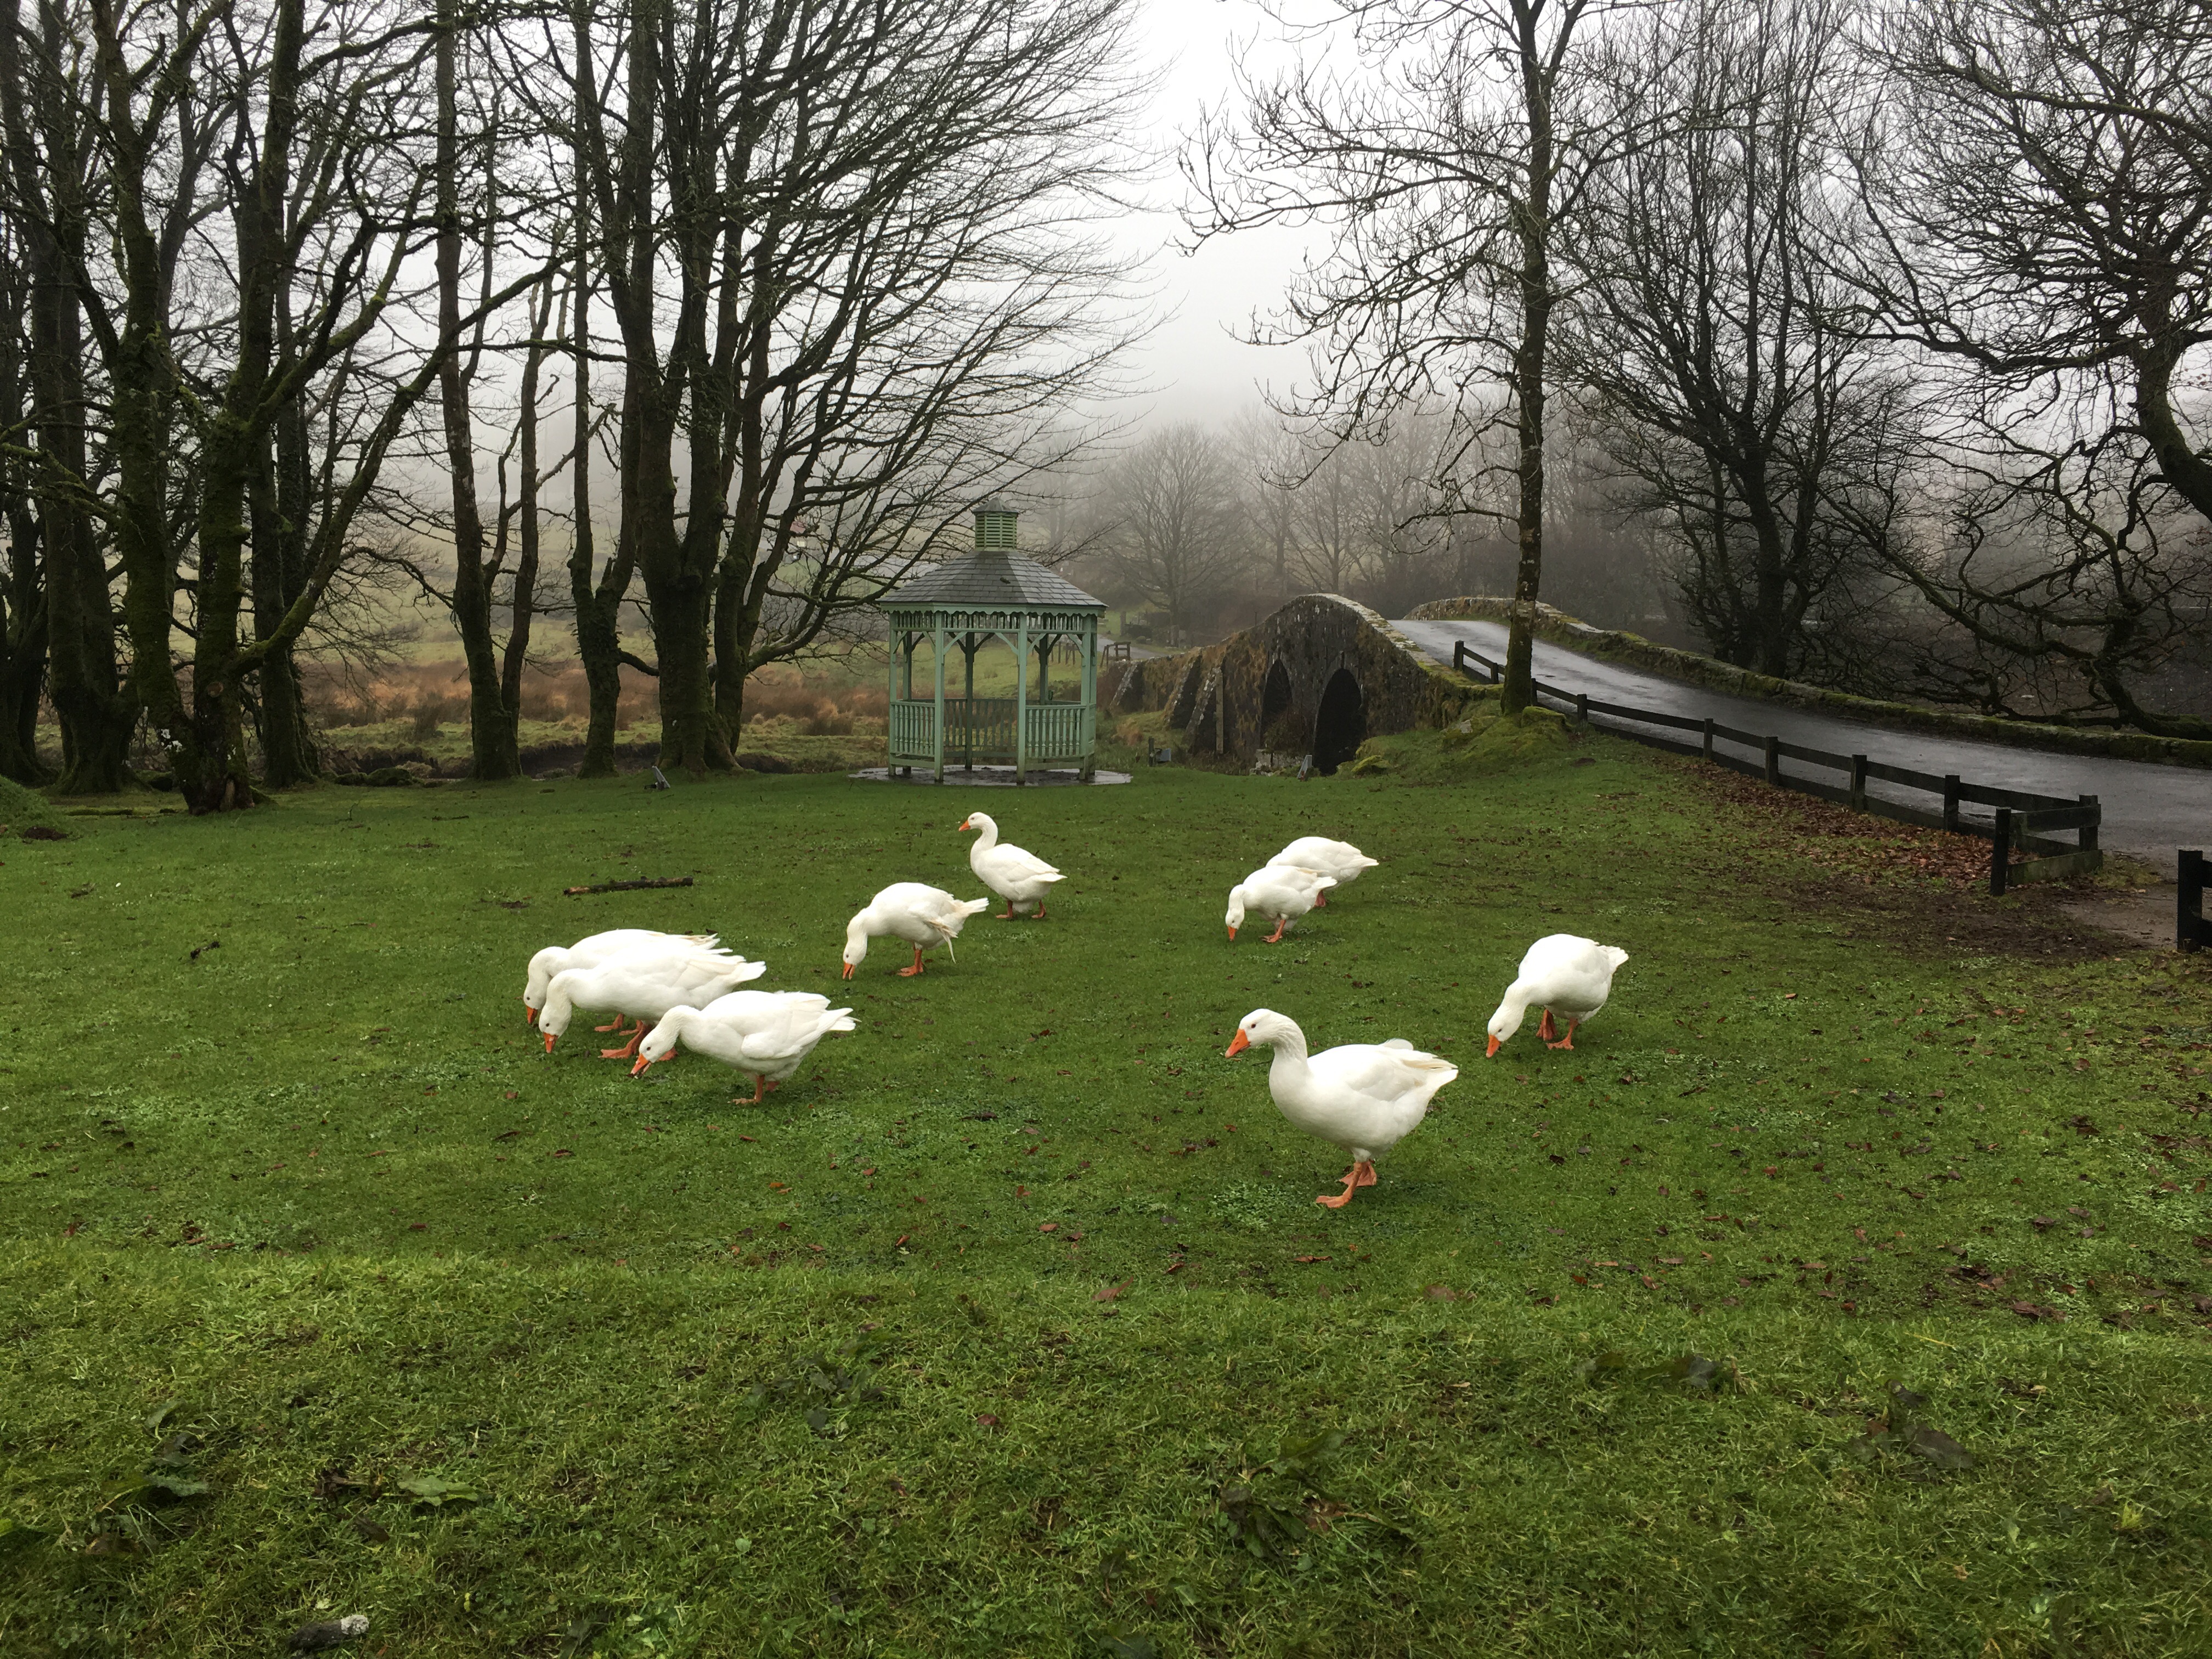
Next from the iPhone, some angry geese. These things attack.
Now the next shots are from the Asus Zenfone Zoom.
And using 2 x optical zoom you can get a lovely close up without being attacked by these angry creatures.
So this is the shot of the gazebo from the Asus Zenfone Zoom.
And using 3 x optical zoom on the Asus Zenfone Zoom.
Now to the LG V10. The gazebo shot first.
And a shot of the geese. All three phones were used in auto mode. To be honest due to the speed the geese were moving that was the only option available.
I tried cropping these shots to see how the LG V10 and iPhone compared to the Zenfone Zoom optically zoomed shots. The V10 overall shoots great quality photos. The optical zoom on the Zenfone Zoom is good too. The iPhone shots are consistent.
Now obviously there is a lot more to each phone and their respective cameras but I thought I would give you something to look at for the time being.